
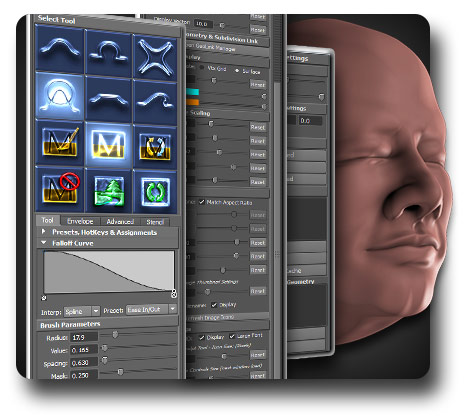
Waxlab’s main purpose is to bring sculpting tools similar to those found in professional stand-alone sculpting packages to the Maya Environment. Every tool is filtered through an editable falloff curve and parameters for precise control of surface adjustments. Every parameter and curve can be stored in a user saved preset and recalled as a hotkey assignment, as a brush preset, or as a selection from the preset list.
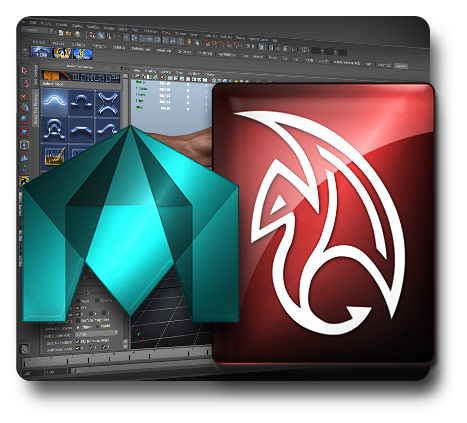
Leverage WaxLab’s intuitive sculpting ability at any time within the Maya Environment. Switch back and forth between Maya’s internal tool set and WaxLab’s to increase your creative options in both modeling and animation.
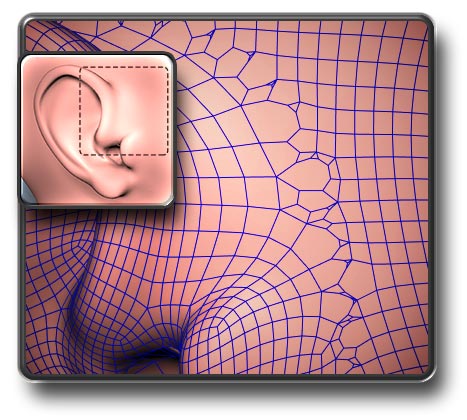
By giving WaxLab the ability to work with any topology, the artist is free to concentrate on ideas rather than technical constraints, like using booleaned models, for example. Currently, Waxlab is designed to work with polygonal models, but you can still use polygonal hull subdivision surfaces, which applies sculpting to the hull; please refer to the manual for more info.
A common practice in 3d sculpting is to create high-density meshes for detail and apply that detail as normal maps on low-density meshes. WaxLab’s GeoLink deformer allows geometry of an equal or lesser number of vertices to follow a parent geometry’s shape. With the ability to link multiple meshes together, you can sculpt the detail on the high-poly model while the lower poly version keeps the general shape. When ready, you can map UV’s to your model and create the normal maps.
Refer to the User Guide for more information.
Masking in Waxlab freezes the movement of vertices, completely or a varying amount, from any Waxlab brush. This allows the user to focus on sculpting the unmasked portion of the model while the masked portion remains immune from accidental alterations.
Stenciling is used to transfer the detail of an image onto your sculpture. While overlaying an image in a special perspective camera view, the stencil image influences any brush from WaxLab as it gets applied to a sculpt mesh. By referencing the grayscale, the vertex movement scales with the brightness of the corresponding location in the image, with black being no movement.
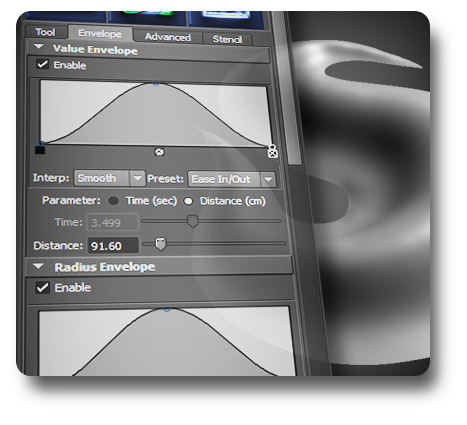
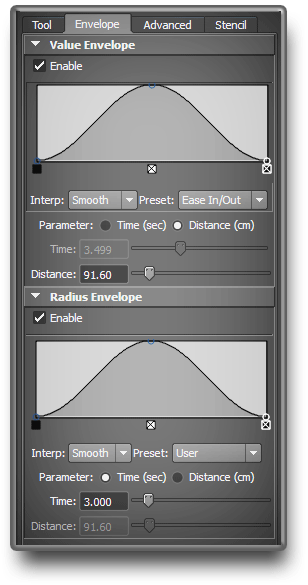
An envelope in WaxLab can adjust either the Value and/or Radius over time or distance, relative to the user adjustable curve. Much like what tablet pen pressure mapping can provide, this mimics the ability to control the application of the brush to your sculpture where varying radius and extrusion is desired, without the use of a tablet.
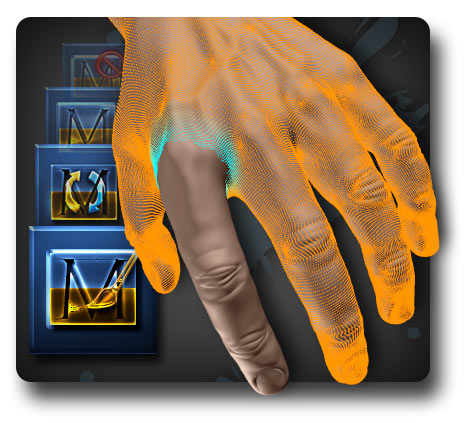
Using a tablet can give the artist more control and precision when sculpting. WaxLab provides tablet support for mapping either Pressure or Tilt to Value, Radius, Spacing and Mask simultaneously, to the Pen or Eraser end. Each mapping can be further refined through adjusting influence type and scale, and when all combined, can provide a wide variety of brush behaviours.
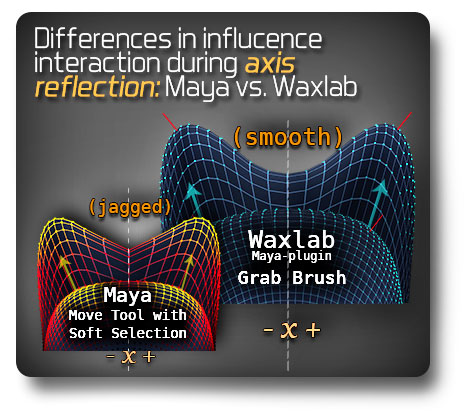
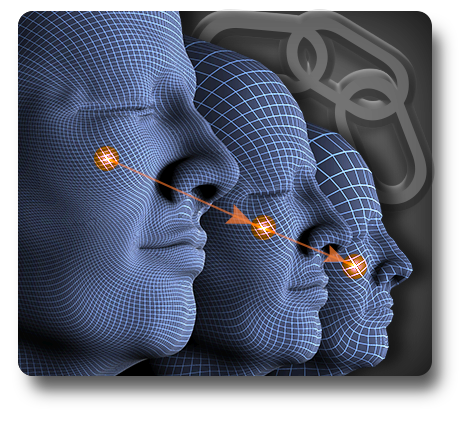
A large amount of sculpting is done with reflection on. In WaxLab, operations that deal with reflections have been refined to maintain perfect symmetry throughout the sculpting process. One focus was on the interaction of when two or more reflected influences come within one another’s radius. With soft selection in default Maya, the interaction usually results in a hard edge along the axis of symmetry and displaced edge loops, but with WaxLab, the result is interpolated to provide a smoothed average that maintains the organic feel of sculpting.
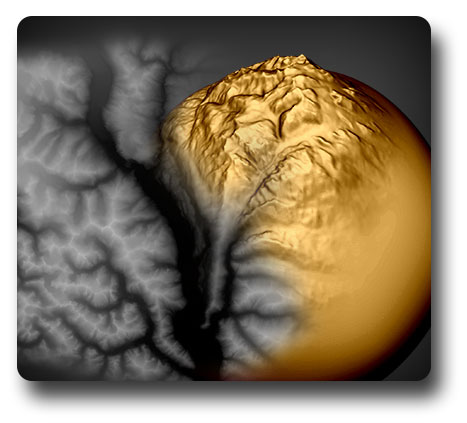
Included with Waxlab 3d, this bonus tool allows you to quickly create polygonal terrain from gray-scale height maps as well as exporting edited terrain. Support for high definition 16-bit geotiffs has been added, as well as PGM file types to support in-game height maps like those for Cryengine and so on.
Extrude is an essential and versatile sculpting brush within Waxlab. By default, Extrude moves the vertices in the direction of which the center surface normal is facing, but there are many surface normal options to choose from. To learn more, check out the Vector Override feature.
Bulge translates vertices along their individual normal. By taking into account the falloff curve and that normals change when surrounding vertices do, the results can form a bubble as well as close up seams.
The Pinch brush is typically used to emphasize a hard edge. Like a vertex vacuum, Pinch pulls all the surrounding vertices within its radius towards the center. With the falloff curve effecting the influence, this gives the effect of pinching.
With three tools in one, Grab, Grab-Rotate and Grab-Scale respectively translates, rotates and scales vertices within the radius of the cursor. Much like soft selection in regular Maya but with some key differences; one being the way WaxLab handles the interaction of reflections (see Smooth Reflection Interaction), the other having the tool set of Waxlab, such as smoothing, stenciling and masking at your disposal.
The Flatten brush can be used to create roads on a displaced landscape or a hardening surface like body armor on your character. Flatten brings the vertices, within its radius, together to a common plane while using the falloff curve to determine the influence it has over each vertex.
By translating vertices, within a radius, in the direction of the brush’s surface movement, and with a falloff curve determining vertex influence, you get the Smear brush. While looking similar to the smearing effect in most popular paint programs, this tool can help bring expression to faces, exaggerate shape animation or skew modeled objects.
The Mask brush applies masking, according to the mask value attribute and falloff curve, to the vertices within its radius. For more information, see Masking under Waxlab features.
This simply toggles the Masking feature On or Off.
The Invert Mask Tool reverses which vertices are masked and which are not on the sculpt mesh. This can be useful in when you want to ask a surrounding area, so instead of painting all of the vertices around this area, you can apply the mask to the desired work area, then invert it.
This clears the mask from the sculpt mesh.
The Stencil tool can be used to apply the specific detail in an image as a sculpt on your mesh. It overlays any image in a special perspective camera view, which then influences all brushes in Waxlab when they get applied to a mesh. Referencing the grayscale of an image, the sculpt value scales with the brightness value of the image, with white being full value passthrough and black being zero value.
This refreshes the stencil image for when the image might be changed outside of Maya and needs to be reloaded into the stencil buffer.
Smoothing averages the vertices within the radius, with the Falloff curve determining the amount for each vertex. It is available at anytime with any brush by simply holding the Shift key when applying the brush.
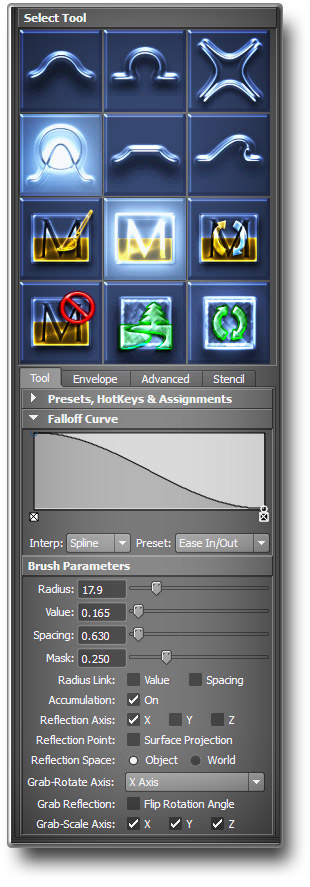
Presets store important parameter values to a file that can be recalled at a later time. They can be assigned to either a tool selection, allowing for custom parameters on different brushes, or to a user definable hotkey. Most adjustable parameters can also be assigned to hotkeys.
When a brush gets applied to an area, the falloff curve is a key parameter that other parameters get filtered through, dictating how much influence the brush has over a vertex at a given distance. This provides the means of creating unique shapes when sculpting. Every Maya curve has a floating point precision of 32-bits, providing over 4 billion points of reference accuracy.
These are the essential parameters that govern the brush’s surface manipulation. Radius is how far your brush can reach over the surface, Value (adjusted by the falloff curve) is the amount the brush will affect the surface area selected by the Radius. Spacing, while normally can be set to very small, can help with various sculpting pitfalls when set to a larger number. For more parameters and a more in-depth explanation, please refer to the User Guide.
This is where you can adjust the envelope’s parameters in Waxlab. The control curve represents either time or distance and what amount either Value or Radius will be at that interval. The beginning of the curve represents the first application of the brush, as you move the brush either Value or Radius changes according to the curve setting. For more information, please refer to the User Guide.
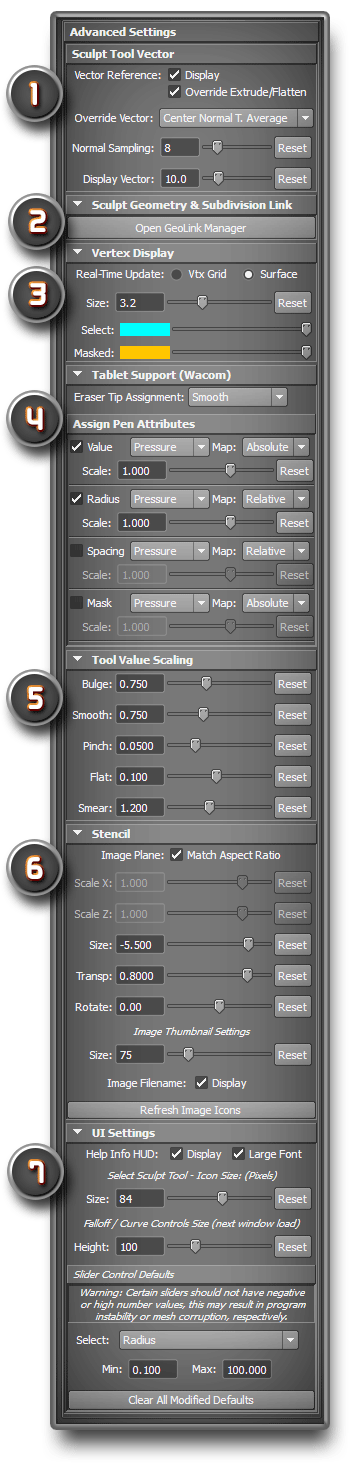
1. Brush Vector Override
Vector override allows more choices on how the extrude and flatten brushes behave in reference to the surface’s facing direction. You can lock the brush’s vector to a specific axis, set it to use the first normal found on button press, or even use an averaged normal vector over time to smooth out frequent direction changes.
2: Geometry Linking Manager
Opens the Geo-Link Manager window, where existing meshes or newly subdivided meshes can be linked and managed to follow the parent’s surface changes. For more information, please refer to the User Guide.
3. Real-Time Edit Display
When applying a brush to your sculpt, there are two ways of displaying the changes being made. One is to display the real-time Surface changes by updating the mesh for every application, this would probably be the most common setting. The other is to have a 2-dimensional vertex point cloud representation of the changes before committing them to the surface when the mouse button is released, this has the advantage of being faster on denser models.
4: Tablet Support Settings
This is where you can map the tablet input to either one of the Waxlab sculpting parameters: Value, Radius, Spacing or Mask. Each parameter can be influenced by pen pressure or tilt and can be mapped relatively or absolutely. Finally there is an additional scale parameter to adjust intensity of the input. For more information, please refer to the User Guide.
5. Tool Value Scaling
These are scalar values that get applied to their respective brushes to lessen the differences between them. This is so moving between brushes while keeping the same value setting is predictable and even as much as possible.
6. Stencil Settings
This is for adjustment of the stencil image overlay. Aspect Ratio, Size, Transparency, Rotate and Thumbnail size are among the key settings.
7. UI Settings
This is for adjustment of tool’s icon size, curve heights, HUD display, and Slider Control Defaults – allowing the user to change the limits set on each slider, which can give unpredictable results.
Maya® is a registered trademark of Autodesk Inc., Copyright 2014, All Rights Reserved. Windows XP®, Windows Vista®, Windows 7® is a registered trademark of Microsoft Corporation, Copyright 2014, All Rights Reserved. Macintosh®, Mac OS X® is a registered trademark of Apple Inc., Copyright 2014, All Rights Reserved.


